So my friend and I kind of decided to plan a day to make a wedding cake. Because that just sounds like a blast. Right? Maybe it was prompted by too much pinteresting on my dream wedding, or maybe just an excuse to make a chocolate cake. Was there an actual wedding that needed a cake? Nope. So now I have a 3 tier cake in my fridge. Just waiting for someone to devour it. Maybe I’ll take more pictures of it before I dig in?
Anyway my joy from this cake will continue… now that I get to share it with you!
Supplies:
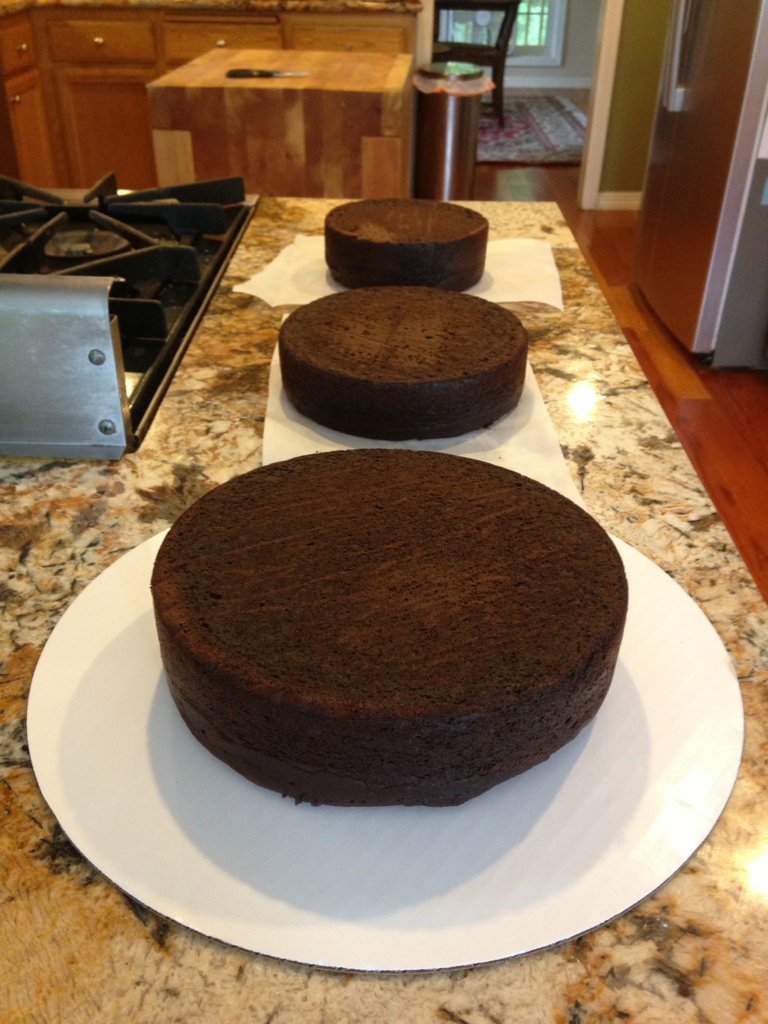
3 chocolate cakes, one 9 inch, 6 inch, and 4 inch. You can even go bigger if you want, it’s all up to you.
For the chocolate cream cheese frosting:
8 oz cream cheese
1/4 cup butter
4 cups powdered sugar sifted
1 tsp vanilla
1/2 cup cocoa powder
For the cream cheese frosting:
2 tbsp butter
4 oz cream cheese
2 cups powdered sugar
Pinch salt
1 tsp real vanilla extract
Here are my beautiful cakes. 🙂 Always level off the top by trimming the cake down, and then flip it over and use the bottom as your flat surface!
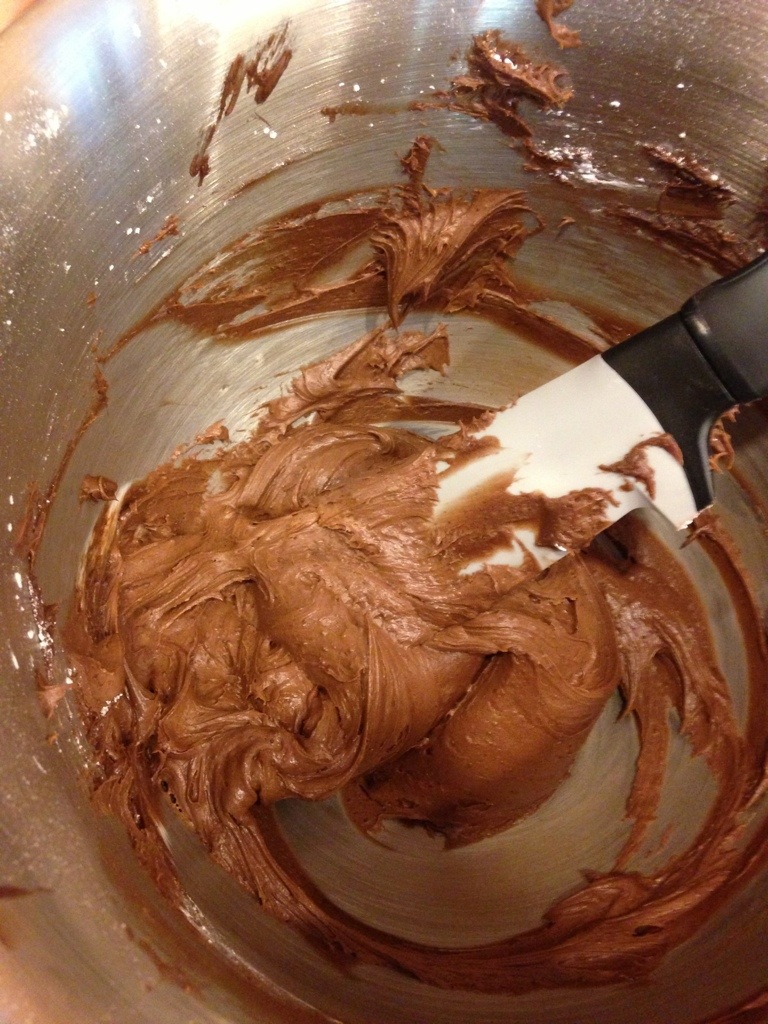
Then make your chocolate frosting, beat cream cheese and butter on high, until light and fluffy, slowly add your powdered sugar cup by cup, finishing with the vanilla and cocoa powder.
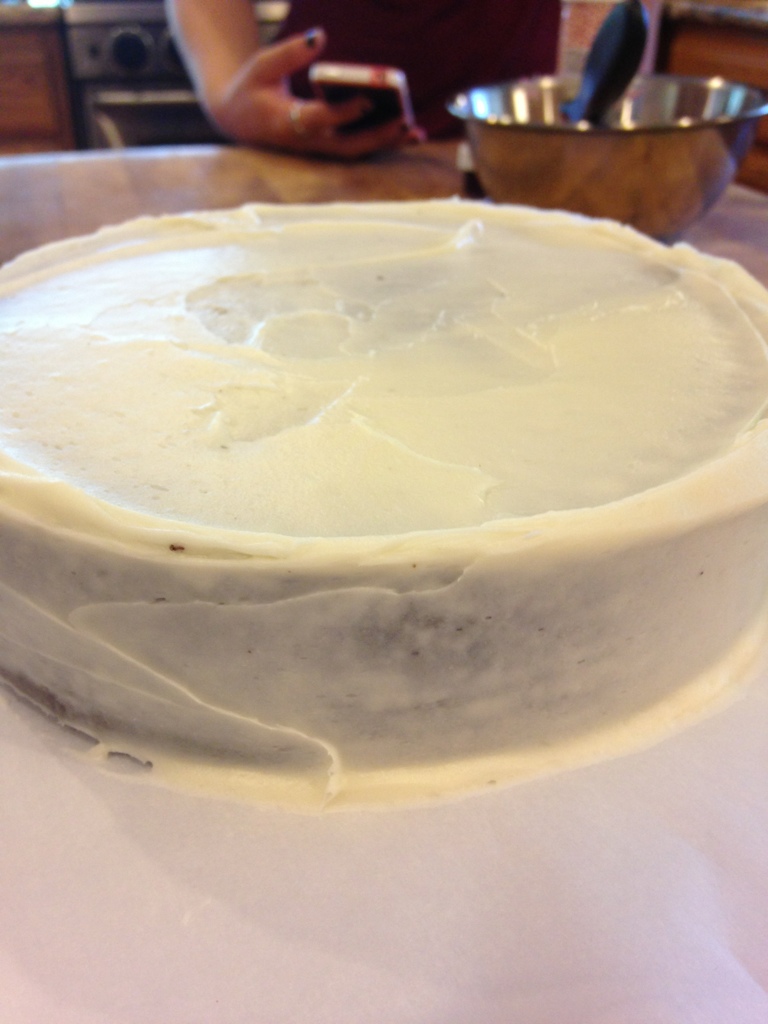
Crumb coat your 9 inch, and 4 inch cakes, and then place them in the fridge to harden.
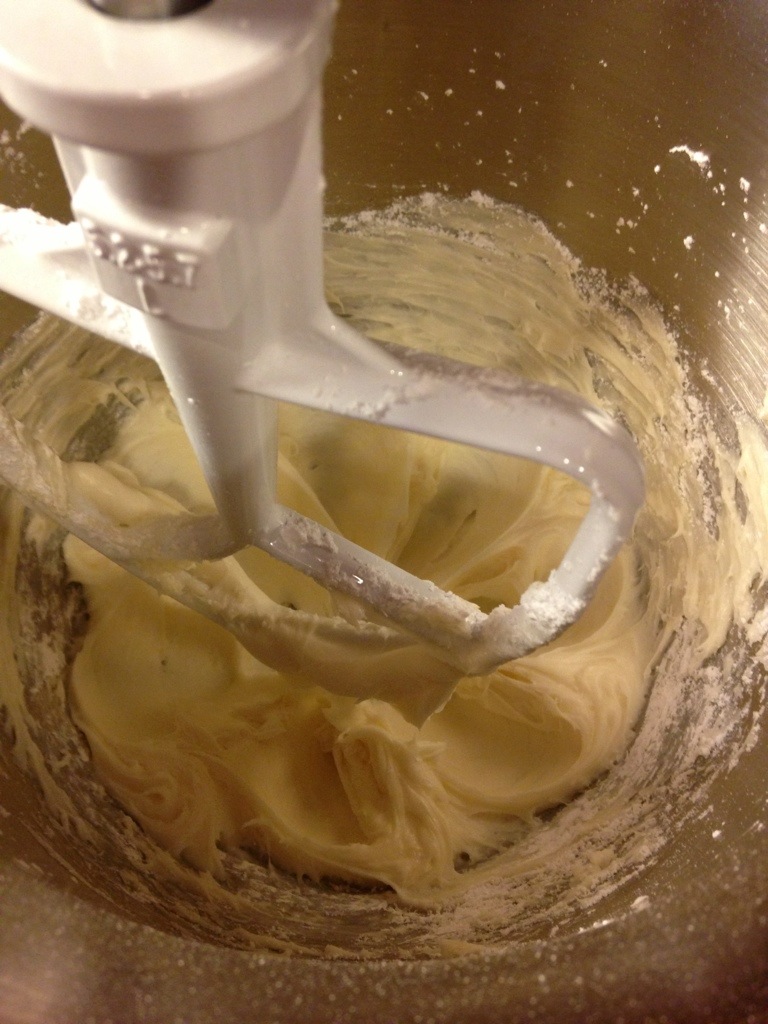
Time to make your regular cream cheese frosting!
Follow the same method as before, beating together your cream cheese and butter, and slowly adding in your powdered sugar.
Grab your 6 inch cake and give it a nice crumb coating too! Plop it back in the fridge!
Yummy yummy!
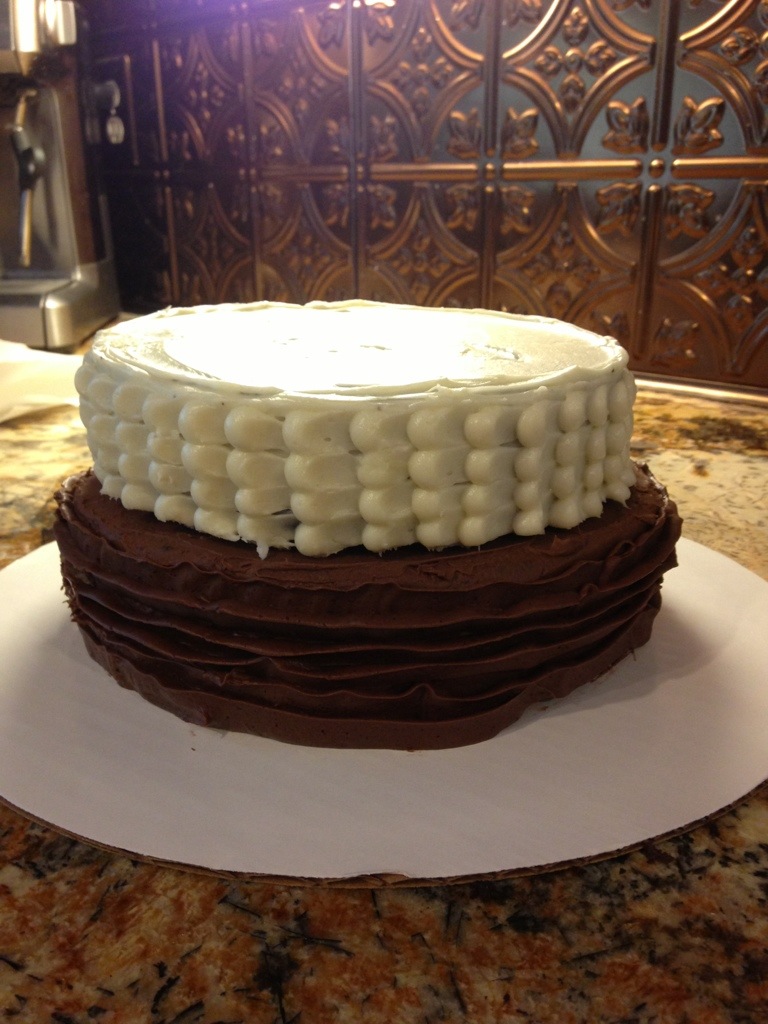
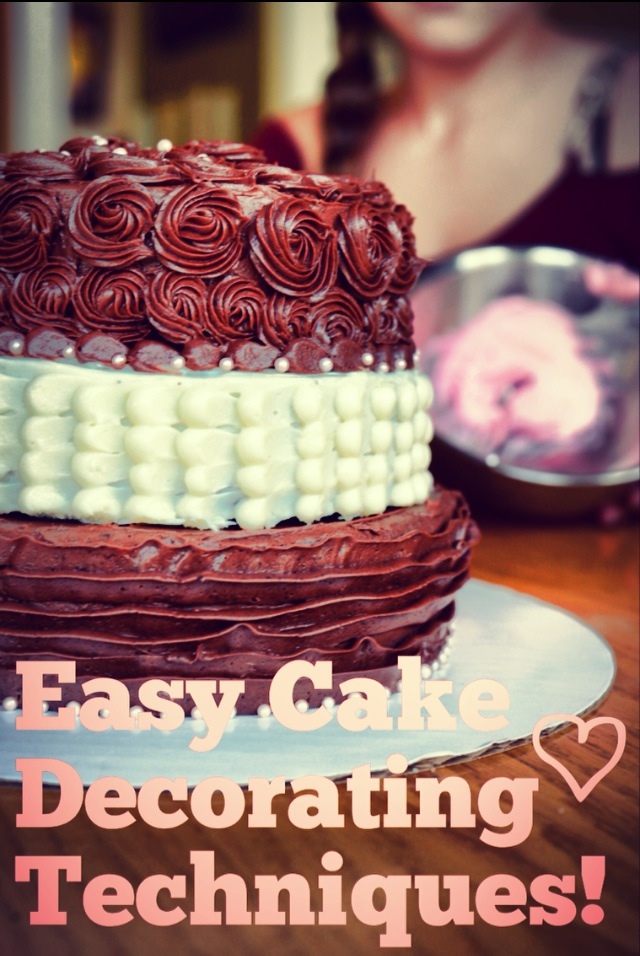
Gather together a Wilton flower decorating tip and a piping bag. Fill it with chocolate frosting. For my bottom tier, I used the frills frosting method. Very easy, check out this website for a more descriptive tutorial! 🙂

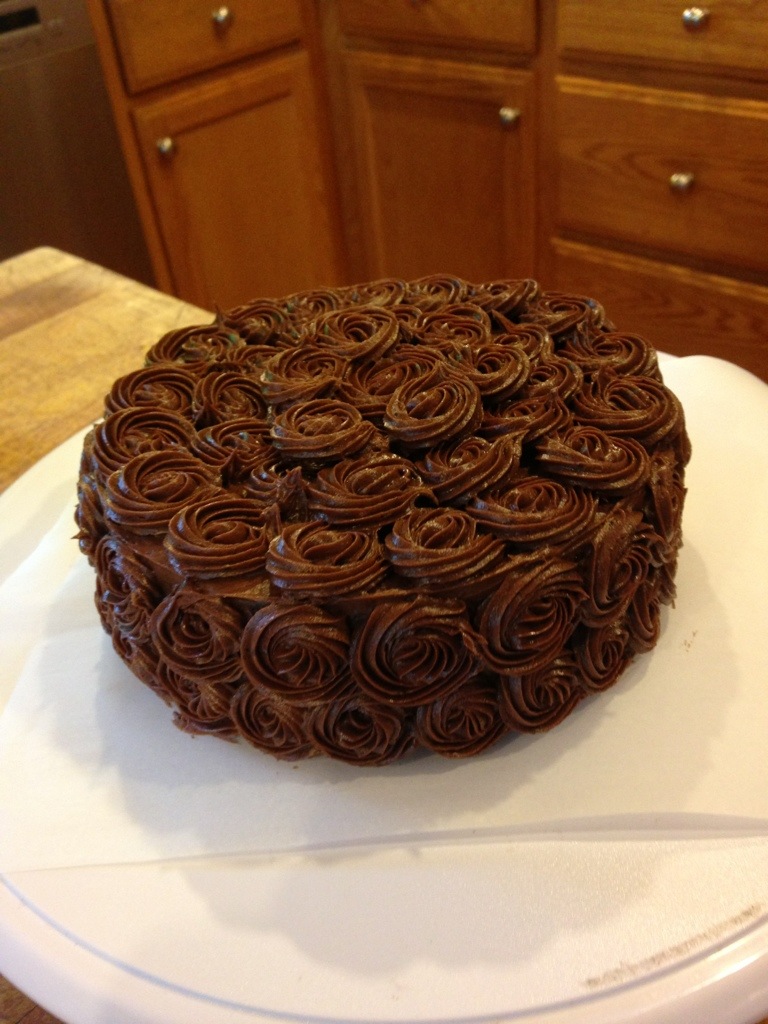
Place it back in the fridge and pull out your top tier, the 4-inch cake. Here’s where you do the rosettes. Gather together Wilton tip number 1M and begin by squeezing a bit of frosting out, then moving your wrist to the right, and then looping it back around as if you were making a backwards U.
The middle tier is my favorite. The frosting technique takes the longest, but is so so pretty! Pull out your crumb coated 6 inch cake, and grab a piping bag with filled with cream cheese frosting, and a round tip, for making dots.

Make 4 dots, starting from the top and working your way down. Then carefully with an angled spatula drag the frosting out. It’s as simple as that!
Allow all of the layers to harden in the refrigerator, and then simply stack one on top of the other according to size. With such small cakes, dowels or cake boards (other than the one on the bottom) are not necessary.

How’d I do? 🙂
Want to come help me eat it? Haha!


From someone that does this all the time, I think you did a very nice job 🙂
LikeLike
Wow! Thank you so much! 🙂
LikeLike
Wow! This looks amazing! =)
LikeLike
Yeah it too easy to make than we thought.
LikeLike
Give it a try!!:)
LikeLike